The Hario Switch has been winning over pour over lovers in big numbers over the last year. I’m a bit embarrassed to admit it, but I was one of those slightly skeptical people initially, just thinking it was a Hario-branded version of the Clever Dripper. Trust me, it’s not.
With its unique design and versatile capabilities, the Hario Switch offers a convenient way to combine the best things from pour over and immersion into a new sort of “hybrid brewing”.
💡 Btw: if you’re looking for my Hario Switch recipe, then click here
About the Hario Switch
The Hario Switch is coffee brewer that combines the best of both worlds – pour-over and immersion brewing techniques.
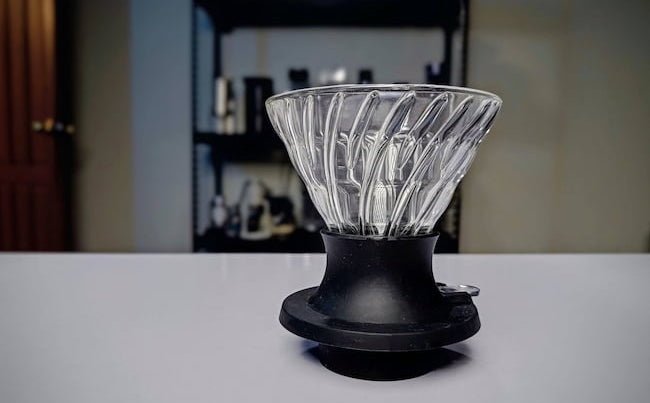
If you’re familiar with the Hario V60, it’s basically like that; just with the added option to shut off the drain and steep the coffee like an immersion brewer.
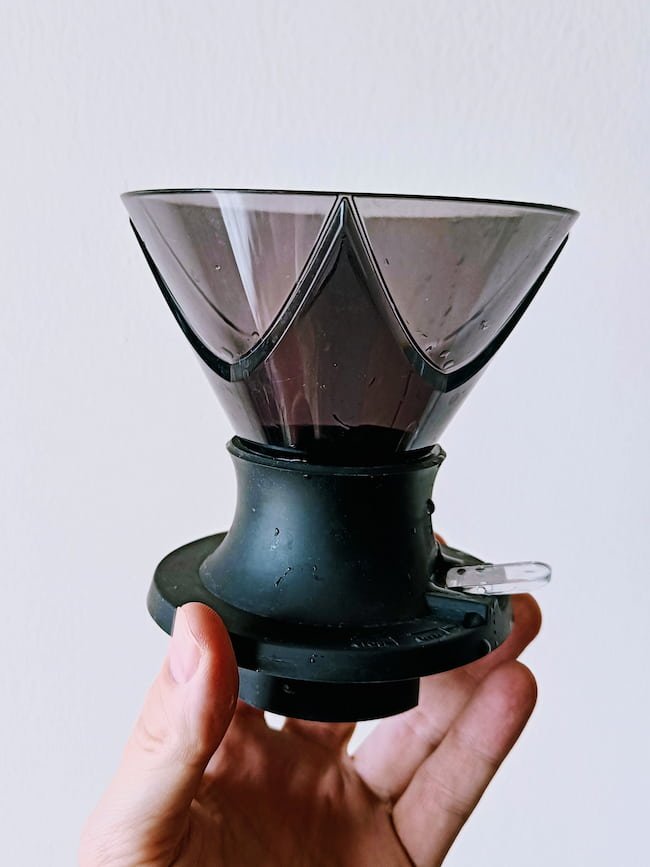
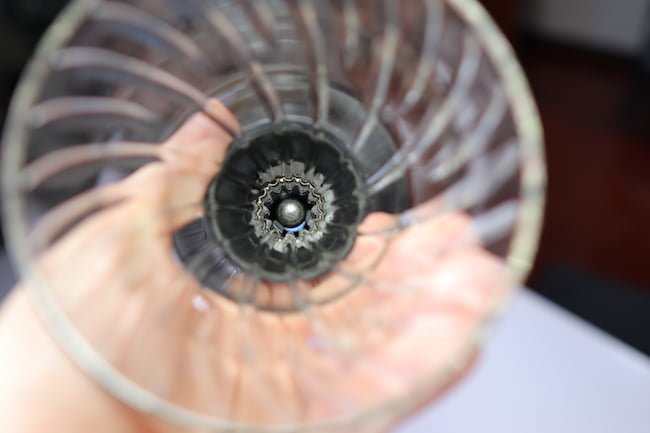
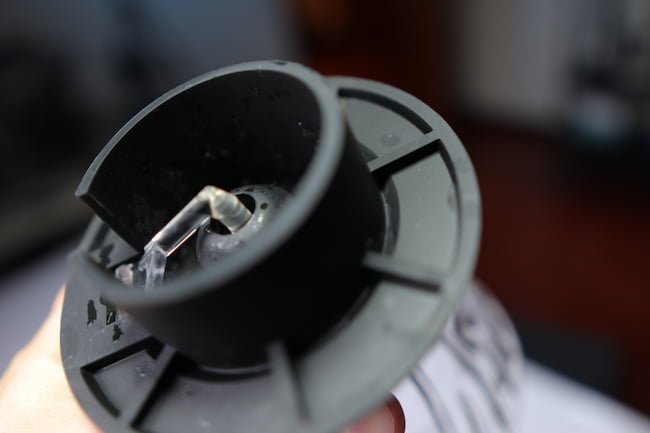
This is done via a clever combination of a steel ball, a silicone base and a plastic lever. It sounds a bit crude, but it works.
There are already countless different Hario V60 recipes out there, so with the added option to steep selected parts of the brew, everything is possible.
Specs
The Switch has a maximum water capacity of 250ml, which can be increased by opening the switch and allowing the water to flow down.
The glass V60 cone is made of Hario’s signature heatproof glass, making it highly durable and thermally stable.
Additionally, the Switch is compatible with 02 size V60 filters, making it easy to use and highly accessible.
There is actually also an even bigger 03 version of the Switch on the market today, but it appears to be pretty rare.
However, personally, I’d say that 02 is perfectly fine if you’re following my recommended method. More about that one later.
Also, if you ever feel the need to upgrade sizewise or play with different options, it is possible to fit other cones on the Switch-base; for instance, the 03 glass cone, as well as the Hario Mugen cone.
I have seen other “Switch hacks” on Instagram, but I can’t guarantee how well they work. If the cone is not perfectly seated in the silicone base, there will be some leaks. For instance, this happened when I tried attaching the steel V60 cone to the Switch base.
A Dual-purpose brewer
Apart from using the Switch as a standard immersion brewer, some coffee geeks (such as myself) prefer to use it for a hybrid recipe that involves a standard pour over mixed with immersion phases.
For instance, you can do a bloom with the switch open and then close the switch to do the first pour, letting it sit for a short period of time, opening the switch to let it drain, and repeating the process for the second pour.
However, the Switch also excels if you’re a bit more lazy, and don’t want to spend too much time pouring carefully with a gooseneck kettle. If that’s your style, then you can just add all the water in one go and let it steep for a few minutes. That will usually result in a rather good cup.
Build quality?
One potential downside of the Switch is that the plastic switch and stainless steel ball valve may not be as durable as other components of the brewer. The plastic arm that pokes the ball does feel a bit flimsy.
However, so far, they have worked perfectly fine in daily use. Blocking and unblocking the Switch works precisely as advertised; just a little touch on the “switch”.
I was a bit surprised at how well it has been working during my time with the brewer.

Difference between the Clever Dripper and Hario Switch
The Clever Dripper used to be the only brewer of its type on the market. But now it’s getting some fierce competition from the Japanese coffee brand.
One key difference between the Clever Dripper and the Hario Switch is the type of filters they use. The Clever Dripper uses trapezoid filters, which are standard coffee filters found in any supermarket.
This can be convenient if you’re already using that type of filter for other brewers.
On the other hand, the Hario Switch uses 02 size V60 filters, which are also widely available and easy to find. I think most coffee geeks will also have a cone-shaped brewer at home.
Additionally, the Hario Switch offers a unique combination of pour-over and immersion brewing techniques, providing more flexibility in terms of brewing style and coffee flavor.
The Clever Dripper, on the other hand, is primarily an immersion brewer with a unique steep and release design that allows for a cleaner cup compared to the French press.
Ultimately, both the Clever Dripper and the Hario Switch are well-designed brewers that offer different features and benefits.

Downsides?
It’s worth noting that the plastic switch and stainless steel ball valve may not be as durable as other components. However, with proper care, they should last a long time.
Some coffee enthusiasts might be concerned about plastic and other materials in contact with the coffee and water during the brewing process. But if you’re worried about plastic, it’s worth noting that other coffee brewers like the Clever Dripper also use plastic components.
Personally, I think the Hario Switch is a versatile and well-designed brewer that can produce delicious cups of coffee. And with proper care and maintenance, it can last for years. So, if you’re looking for a convenient way to brew different volumes of coffee, the Hario Switch is definitely worth considering.

The Coffee Chronicler Hario Switch recipe
There are multiple ways to use the Hario Switch. It can be used as a Clever Dripper or as a combination of immersion and percolation. Tetsu Kasuya has popularized a technique, known as “the devil Switch technique”.
Recently, I have been experimenting with my own twist on this technique and it has been very well-received by my people who watch my YouTube channel.
This technique is simple, easy to remember, and can be adjusted to fit different types of beans, grinder capabilities, and personal tastes. It also extracts more than Kasuya’s technique and is a bit more suited for the light Nordic roasts I often drink.
The recipe is also designed to be consistent while emphasizing the fruity flavors and acidity that pour over coffee is usually famous for.
Specs
- This recipe can be adapted to work with doses from 15 to 26 grams of coffee and the most common brew ratios.
- Go for a 1:15 ratio if you have an entry-level conical grinder (such as a Baratza Encore or Hario Skerton).
- Adjust to 1:16 or 1:17 if you have a more consistent grinder.
Pouring structure:
❶ 0:00 First pour: 50% total water volume (Open switch)
❷ 0:45 Second pour 50% total water volume (Closed switch)
❸ 2:00 Open the Switch and let it drain
Total brew time = 2.45-3.15.
However, the total brew time can be a bit longer if you’re brewing around the max capacity for this technique (26 g / 400 ml) or are using natural Ethopians.
What I love about this recipe is its flexibility, allowing me to easily brew smaller or larger doses, and adjust the ratio and grind size to my liking.
The end result is a cup of coffee that is both bright and full-bodied, with the acidity of pour-over and the ease of use of immersion.
I can enjoy this type of coffee every morning, and I believe that most people would feel the same once they start brewing with this method.
Overall, this hybrid technique combines the aggressive percolation phase of pour-over with the extraction of immersion that adds body, depth and mouthfeel.
The recipe is super flexible, and you can easily adjust it to your preferences while retaining the core of the method.
The Verdict
The Hario Switch is a versatile and unique coffee brewer that offers a lot of flexibility in terms of brewing techniques and volumes.
Despite its potential durability concerns, it is a well-designed and practical brewer that can produce excellent cups of coffee.
So, if you don’t already have a Clever Dripper in your collection, I think this is the better “steep and release” brewer on the market.

