
The French press is a tried-and-true method for brewing coffee — when done right.
It saddens me to say, but more often than not, the coffee coming out of this otherwise classic and noble brewing device isn’t great.
The French press was one of the first brewing methods I delved into back in my early home barista days. It was a profoundly frustrating experience. I could never get the coffee to taste as good as I could with other brew methods. I think many specialty coffee people feel the same way.
Ultimately, I gave up on the brewing method for years before I finally figured out what was wrong and how to fix it.
However, I’m glad that I gave the brewing method a second chance. It is worth it to understand the French press since it’s so ubiquitous in many parts of the world.
Here’s a step-by-step guide to my new favorite recipe (paper-filtered French press) and some extra guidance to get you on the right path.
French Press Recipe for a Clean & Tasty Brew
Before diving into the recipe, ensure you have the following essentials:
- Good Coffee: Quality beans make all the difference.
- Soft Water: Water is almost as important as the coffee. To know more about the ideal water for coffee, read here
- Clean French Press: If you’ve never disassembled and cleaned the mesh screen and plunger, now’s the time.
Ingredients & Ratios:
- Coffee: In the recipe video, I use 330 ml to 22 grams of coffee (but you can adjust according to needs)
- Ratio: 1:15
With a standard grinder, lean towards 1:14. A high-end grinder can handle the 1:15 ratio.
Adjust your grind for the French press—use about 15% more coffee than you would for drip methods. The Golden Cup standard doesn’t apply to the French press!
Grindsize: similar to an “AeroPress setting” or a superfine pour over.
Reference settings:
- 1Zpresso K Max: 5.5
- Comandante C40: 20 clicks on the
- Timemore 078: 4-5

Steps:
- Preparation:
- Spoon
- Digital scale
- Cup (both for drinking and storing the hot, rinsed paper filter)
- Carafe for decanting (optional, but highly suggested).
- A paper filter. Most brands and types can work, but a basket-shaped one is most suitable. Ensure it’s the right size for your plunger – it should fully cover the plunger and extend 1 inch on the sides or a bit more.
- Prerinse and preheat: Take your paper filter, open it, fold it sideways (opening it, makes it easier to handle when wet), and toss it into the empty French press. Simultaneously, preheat and rinse the filter using hot water. Use a spoon to remove the filter, placing it in your cup to cool. Pour out the excess water.
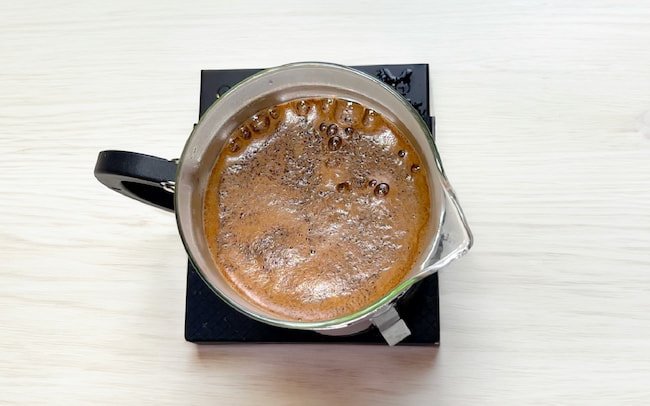
- Pour and Stir: Pour in your coffee grounds. Add the total volume of water, pouring aggressively. Then take your spoon and stir the brew eight times, ensuring all grounds are touched.
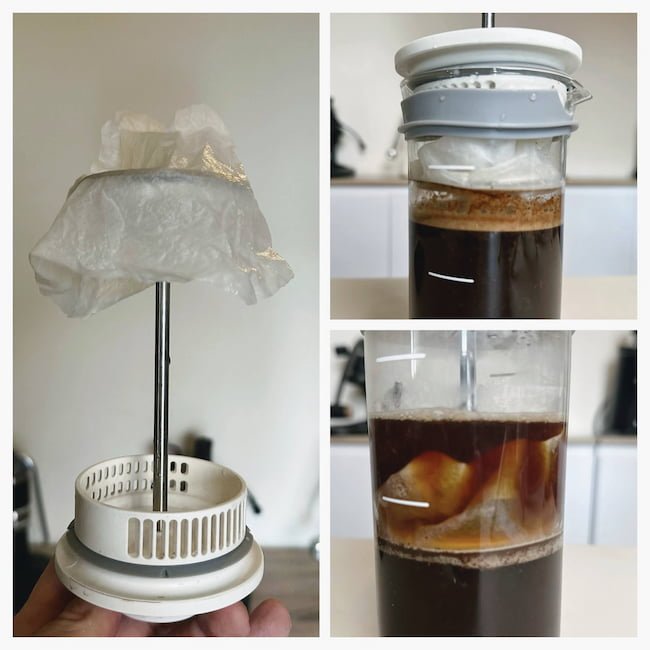
- Wait: Set a timer for 1 minute. While waiting, gently squeeze the paper filter to get rid of excess water, and wrap it around the plunger.
- Stir: After the first minute, stir the surface of the brew gently to break any crust.
- Wait another minute.
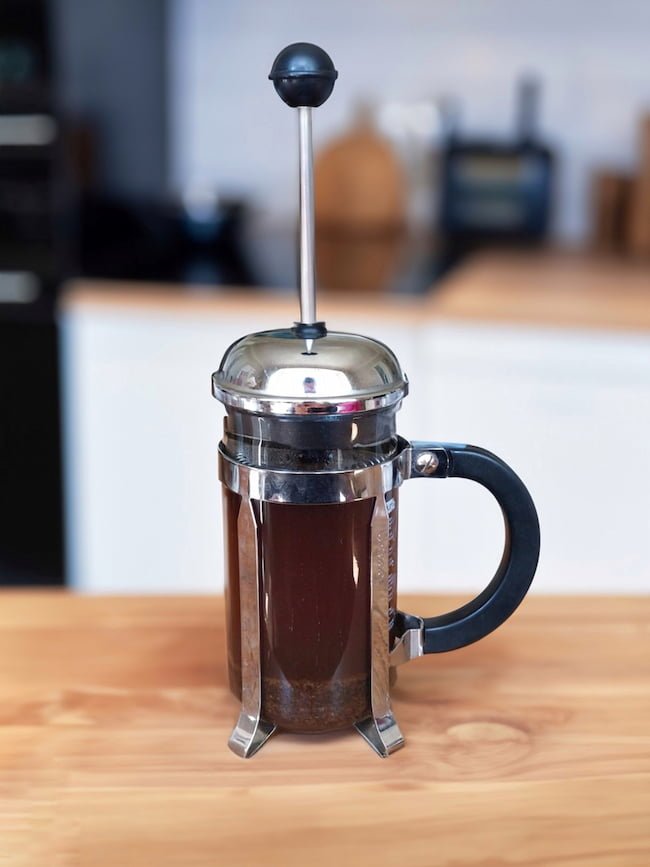
- Plunge: Carefully insert the plunger with the paper filter attached. A tight seal is indicated by resistance and a hissing sound. Plunge slowly, taking about 45 seconds to a minute.
- Decant: Immediately decant the brewed coffee into a carafe to bring it to an ideal drinking temperature.
- Serve & Savor: Pour yourself a cup and enjoy one of the cleanest and tastiest French press brews you’ve ever had.
Total brew time: 2:45-4:00 (depending on how long time it takes for you to plunge. Plunging slow is encouraged – similar to how you do it with an AeroPress!)
The resulting brew should be clear of oil and silt, and be flavorful and nuanced.
With this method, You should achieve a 20-21 % extraction. If the coffee tastes too weak, you probably either need to grind a bit finer or do more preheating.
If you get silt in the cup, it’s most likely because you’re pressing down the plunger with too much force.
It could also be that your French press plunger is not snug in general. Perhaps the mesh screen is bent and needs replacement. This technique will work better for presses that have a snug plunger with a silicone seal like this one from Timemore.
However, even if you get silt in the cup, you can still achieve some outstanding cups with this brewing method.
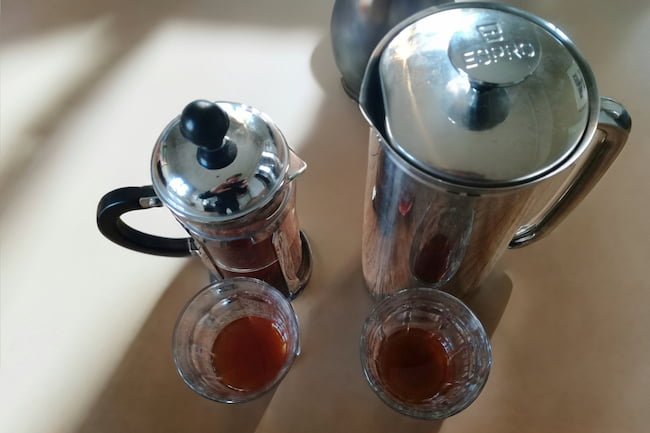
Brew bigger batches
I’m really excited about this brewing method because, suddenly, it’s easy to brew large quantities of specialty coffee without investing in expensive equipment.
Let’s say you want to brew 12-15 cups of AeroPress quality brew for a group of people. In theory, you can do it with this method. Maybe you’re visiting family members who only have a French press?
No problem, you can use the French press paper filter “hack” and get a much more nuanced brew out of it.
Serving specialty coffee for a big group of people is not an easy task. Batch brew via something like the Breville Precision Brewer used to be the only alternative. But that’s slower and more expensive.
Are you excited about the AeroPress XL and the upcoming Premium model? Well, then you should be excited about this brewing method because you can brew XL-sized brews (and larger) while not having any plastic parts touching the brew.
Common objections against the paper filter hack?
The combination of a faster brew time, finer grinds, and a paper filter brings vibrancy to the front in a way I have never encountered before.
Some people are fans of coffee oils. I’m not convinced that they do anything great for the flavor. If you still want a silky clean cup, but WITH oils, you can use a special type of coffee filter material known as “non-woven”.
This material is similar to what you see with these single-use drip bags.
Why not just use Clever dripper, AeroPress, or strain a regular press?
While there are some similarities with the brewing methods it’s not quite the same in terms of filtration dynamics.
- With Clever you can’t avoid the percolation aspect
- With the AeroPress you’re pressing the water through the puck, which can cause higher turbidity
- Straining French press through a separate pour-over cone is inconsistent. It can clog very easily, and even if it doesn’t it takes a long time and can cause bitterness.
With this method, you get a “pure” immersion that has not been filtered through the coffee bed. And this is important, because the coffee bed is a much more potent “filter” than paper.
Instead, here you trap everything, including grounds and silt, at the bottom of the French press. In this sense, this recipe is more similar to cupping.
Besides that not everyone has a Clever/AeroPress etc. With this method, you can brew 1.5 l of high-clarity specialty coffee in 3 minutes.
Common French Press Mistakes
There are so many pitfalls when brewing with the French press.
On the surface, it looks like a forgiving brewer, but the combination of tricky thermal management, coarse grounds, poor cleaning, and muddy cups makes it an unforgiving device.
Here I’ll discuss all these things and more.
#1: Don’t grind coarse when using a french press.
The most common mistake with the French press is thinking you need to grind the coffee very coarsely. This myth has been repeated so often that it’s going to be very hard to correct.
There are several downsides to coarse grinding and no real benefit, as far as I can tell:
- Coarse grounds are harder to extract. Water needs to soak into the coffee, and bigger particles make the job harder. If you grind very coarse, it’s likely that a big percentage of each coffee ground will never fully extract.
- It’s easy to underextract the French press if you use standard advice (grind coarse and steep for 4 minutes). Bigger particles necessarily mean longer brewing times.
Here’s a thought: Consider using the same grind size you’d employ for pour over coffee, or perhaps even a finer setting akin to what you’d use for an AeroPress.
Doing so allows you to brew your coffee more quickly and use fewer coffee grounds, making the process more efficient overall.
A common misconception with the French press is that the “coarse grind” advice is sacrosanct, often resulting in weak and watery coffee.
The recommendation for a coarse grind is largely based on the coarser mesh of the French press plunger compared to other filtration methods. However, this mesh is perfectly capable of handling slightly finer grinds. Don’t believe me? Just take a quick look at your mesh screen and coffee grounds.
Whether your coffee is ground to a target size of 900 microns (typical for French press) or 600 microns (common for pour-over) shouldn’t make a significant difference.
The real challenge comes from the bi-modal nature of coffee grinding. While some particles will match your target grind size (ranging from 500-800 microns), a large proportion will be much smaller.
These tiny particles, known as “fines,” can be as small as 5 microns. For context, a human hair is around 70 microns thick. Simple math tells us that no mesh screen will completely filter out these minuscule particles, which is why you often find some sediment or silt in your French press coffee.
However, this silt isn’t the result of grinding too finely; rather, it’s an issue of not accounting for these particles in your brewing technique. The finest particles tend to settle quickly at the bottom of the press.
Agitating the brew too much—whether by plunging too vigorously, stirring near the end of the brew time, or pouring too quickly—can bring these particles back into suspension.
Even with a medium grind, you can achieve a clear cup of coffee. The key is to pour slowly and minimize agitation.
#2: Ditch the “Golden Cup Ratio”
Many believe that using 55-60 grams of coffee per liter of water is the optimal brew ratio for all situations. However, that’s not true.
The so-called “Golden ratio” is designed for percolation coffee – not immersion brewing.
Surprisingly, the French press is not as efficient a brewing method as the pour over.
I understand this might seem counterintuitive, but allow me to clarify.
It’s essential to be familiar with the concept of ‘liquid retained ratio’. In simpler terms, whenever you brew coffee, the coffee grounds absorb and hold onto some of the water.
With pour over, some water stays trapped in the grounds (a typical LLR for pour over = your coffee dose x 2.2.
The liquid retained in the coffee grounds is a lot weaker than the rest of the brew.
When you use immersion methods, like the French press or cupping, the “liquid retained” is the same strength as the rest of the brew.
In other words, you’ll end up diluting the same amount of coffee solubles in more water. But if you want a similar extraction to a pour over you need to compensate by using around 15% more coffee.
An easy way to calculate this is by just taking your regular coffee brewing ratio and reduce it with two steps:
- 1:17 becomes 1:15.
- 1:16 becomes 1:14
Using coarse grounds and a ratio such as 55 grams of coffee to 1 L of water, is a recipe for thin and sour French press.
#3: Don’t fight the crust
When you brew coffee using a French press, the coffee grounds naturally float to the top, forming what we call a “crust.” Now, many folks see this crust and instinctively want to stir it, thinking it’s an obstacle to a good brew. But that’s a big mistake, if you’re following a more mainstream French press recipe (that, unlike my approach, does NOT have paper filtration.)
When the crust forms, something fascinating happens. The smallest coffee particles, having released all their CO2, become fully saturated and sink to the bottom. On the other hand, the larger particles, still buoyant with gas and porous in structure, float. It’s like the coffee is naturally filtering itself, with the smaller particles at the bottom and the larger ones closer to the surface.
Instead of fighting this natural process, you should be working with it. If you plunge directly onto the crust, it acts as an additional filter, trapping those fine particles in the bottom of the brew and gradually bigger and bigger the closer to the surface.
Only the smallest particles (aka fines) can bypass the mesh and get into the brew. The bigger particles are too big to do this – this is something you can easily observe with your own eyes. So you want them acting as an additional filtering layer.
The Stirring Dilemma?
But here’s the catch: You should also stir your French press brew. This will give you a higher and more consistent extraction. So, what’s the solution? Stir briefly after adding half the water—just a quick north-south, east-west motion to ensure all the grounds are well mixed. Then, pour in the rest of the water. A robust crust should still form on the top.
This way, you get the benefit of agitation without losing the crust’s natural filtering ability.
What if you follow one of the most common French press methods, the James Hoffmann method?
His French press technique calls for breaking the crust AND skimming the surface, a technique borrowed from coffee cupping. This approach also works very well, but if you opt for the Hoffmann method, you must commit to it fully.
That means waiting the full 5 minutes after breaking and skimming. As his method prescribes, this period allows the grounds to settle at the bottom. You can’t just skim and pour; it’s an all-or-nothing deal.
So, if you’re a Hoffmann disciple, the crust is irrelevant; follow his method to the letter. But if you’re brewing a more “standard” recipe, you need the crust.
#4: Thermal Management
A common misstep with the French press is brewing at a temperature that’s too low and then serving the coffee too hot.
Here’s why:
Many coffee lovers own a single size of French press and use it whether brewing two or eight cups. But the French press isn’t particularly lenient when it comes to maintaining temperature.
Even if you pour boiling water in, the temperature can quickly drop below the 200 F / 93 C. If you’re brewing a lighter roast that’s a big problem.
Generally, brewing at its capacity or within a 25% variance with a glass French press should be fine. However, preheating becomes essential if you’re using a steel press.
Another unique challenge with the French press is that it’s an all-in-one device: you brew, store, and serve from the same container.
This often means you’re pouring coffee that’s too hot to drink.
Unlike pour-over, where the heat is absorbed by the cone and the coffee cools down in the carafe, the French press retains its heat.
As a result, it might be a while before your brew cools to a comfortable drinking temperature— ideally about 15 degrees Celsius above body temperature.
A simple solution?
Decant your coffee into a carafe. This cools it instantly. Plus, decanting gives you an extra step to leave behind any silt.
In a recent poll, I conducted on YouTube, over 51% of my subscribers expressed their aversion to silt in their coffee. So using a carafe for decanting is an easy hack to make your French press a bit more tasty.
How to Clean Your French Press?
Cleaning a French press can be annoying, especially if you don’t know how to do it. Compared to many other methods, it’s slightly more messy because you’ll have many grounds that can clog your drain.
But there is a quick and easy way to clean your French press effectively.
Step 1: Get your kitchen strainer out
First, take off the lid of your French press. Don’t dispose of the coffee grounds down the drain as it can clog your pipes. Instead, use a standard kitchen strainer to collect the grounds. You can either throw them in the trash or, better yet, add them to your compost pile if you have one.
Step 2: Rinse the French Press
Fill your French press halfway with water. Swirl the water around to loosen any remaining grounds, then pour the contents swiftly into the strainer to collect any leftover grounds. Repeat the step if necessary. With a swift movement, dispose the coffee grounds into the bin or compost.
Step 3: Soap and plunge
With all grounds removed from the vessel, add a small amount of dish soap and fill the French press halfway with warm water. Place the lid back on, insert the plunger, and then pump it a few times. This step will help clean the press’s sides and remove any lingering coffee oils.
Step 4: Rinse and Dry
Once you’ve scrubbed the French press, empty out the soapy water, then rinse the press thoroughly with clean water to remove any soap residue. Finally, dry your French press with a dish towel or leave it on a drying rack.
And there you have it! Your French press is now clean and ready for your next coffee brewing adventure, and your drains are free of leftover grounds.
