There was a lot of hullabaloo when the Wilfa Uniform was released around a year ago.
The combination of flat burrs, minimalist design, and Tim Wendelboe’s name managed to stir up a lot of hype.
Since then, we haven’t heard much about Wilfa’s new flagship model.
Sure, a coffee forum bro here and there has referenced it, but in terms of actual testing and reviews, there hasn’t been much.
I think this is mostly due to the lack of availability outside Europe. However, the lack of overenthusiastic reports from users probably also has something to do with the stagnant hype train.
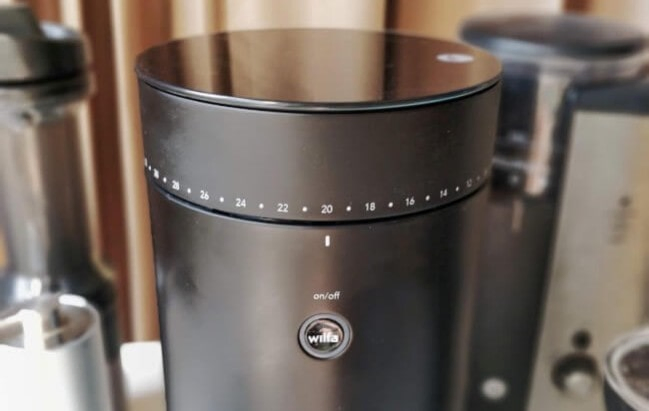
I got the Wilfa Svart Uniform about a year ago and gave it a pretty positive review. Except for the odd inclusion of the scale, I thought it did well as a single dose brew grinder with moderate espresso capabilities.
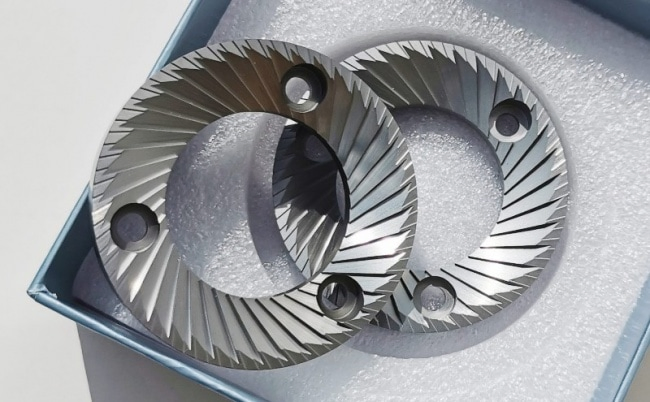
However, when I saw that the Korean burr specialist SSP was releasing special burrs specifically for the Wilfa Uniform, I got inquisitive.
The grinder was good, but could it get even better?
Here’s my experience with the Wilfa Svart Uniform one year in. Both before and after SSP burr mod.
Why upgrade the burrs?
So why did I upgrade the burrs when I was initially happy with the grinding performance?
I’m afraid there aren’t any good reasons except for curiosity. For a long time, I have heard about the unique capabilities of SSP. However, this brand mostly produces flat burrs for commercial grinders, so I never had the opportunity to try them at home.
The burrs in the original Wilfa are flat and of decent quality. However, their geometry isn’t explicitly meant for coffee brewing. They can be used for espresso, too.
Espresso burrs are known for producing some fines. This is needed to bind the puck together. Brew burrs, on the other hand, are designed to have as little of the dusty, fine particles as possible.
How to do it?
SSP is a small company from Korea. To make sure I was getting the right set of burrs, I also sent an email to the owner, Hansung, before ordering.
The price for the burrs was $150, including shipping. Not exactly cheap, but they came extremely fast with FedEx.
When you order burrs from SSP, you can choose to get a special coating that will prolong the sharpness of the burrs. However, this isn’t advisable if you’re a home user, since the burrs are made for a 1000 kilo of coffees. With my current rate of coffee consumption that would take me a few decades to reach.
There weren’t any instructions on how to swap the burrs, so I had to experiment a bit to get the installation right.
It’s actually not very difficult to do most of the work. However, it does take a bit of guesswork and experimentation to find the zero point of the new burrs.
Installation:
- Take off the lid, keep turning the adjustment dial clockwise. That’s towards the coarser settings. Just keep going until the hopper/dial is completely unscrewed.
- I would advise you to clean the internal grinding chamber now as well. Use an old (tooth)brush to remove anything stuck in the threading of the chamber. Then use a vacuum cleaner to suck out any remaining grounds.
- Use a standard star screwdriver to remove the original burrs.
- Install the new SSP burrs. Make sure to check which burr is upper and lower, respectively.
- Screw the top back on. Run it on setting 10 with a little handful of beans to test your work. If it’s too coarse, you need to unscrew the top and go back and adjust the zero point.
- If the grounds seem very fine (i.e. close to espresso), you risk burr rub at the finest setting. Run the grinder without any beans on the hopper on setting 8. If there’s no sound from burr rub, proceed to step 7, then 6, and so on. Keep going until you’re at the zero point. If you hear any sharp metallic sounds, you want to turn off the grinder right away.
- Most likely, you won’t get the correct calibration in the first try. If that’s the case, dismantle the top once again. Adjust the zero point on the burr carrier by removing the three small screws connecting it to the hopper. To see how watch the video above.
- Unfortunately, there’s no sure way to find the right spot first time, so you have to keep adjusting it incrementally until you find a point where there is no burr rub at step 0, while the range from around 10 to 25 would be acceptable for pour over.
Results: Wilfa Uniform SSP Burr Upgrade
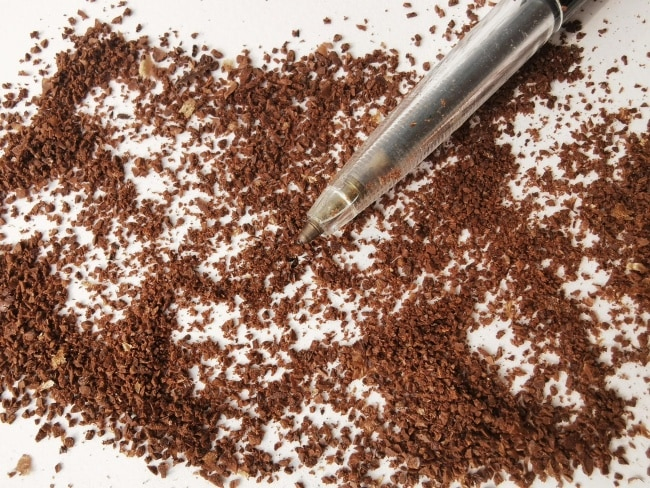
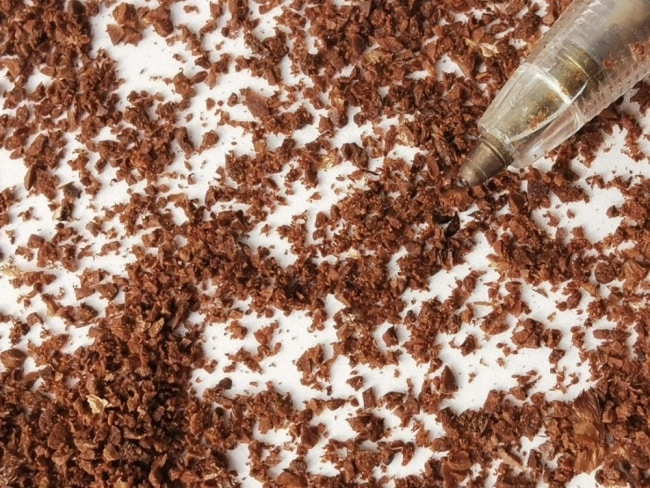
In the beginning, there were some odd sounds and weird stops here and there with the new SSP. When inspecting the grounds visually, I was stunned at how uniform they were. Compared to the old standard burrs, there were fewer fines.
When I compared to premium hand grinders such as the 1Zpresso Jx or Lido 3, it also seemed more consistent.
In fact, I had never seen grounds this consistent before.
But in the cup, I didn’t get remarkable results. This was puzzling.
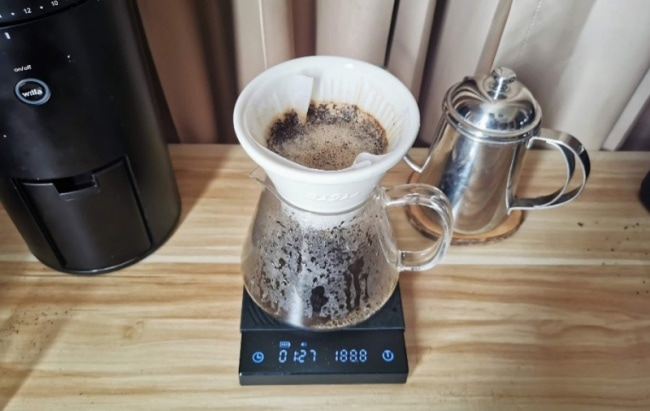
Due to the lack of fines, the water drained too fast when doing pour overs. However, after adjusting my technique, I started to get cleaner and cleaner brews.
One thing I noticed was the extraction increased dramatically due to the uniformity of the grounds.
I have always been a big fan of 1:15, but this is simply too much with the Upgraded SSP Wilfa. When I started using a ratio of 1:17,5, my cups tasted a lot better.
I have tried many grinders before, and they usually bring their own characteristics to the cup, but I have never had to adjust my brewing style this much.
In the end, I will say that this is the most consistent grinder I have ever owned. However, I’m not sure if my coffee tastes that much better than my less consistent (but also excellent manual grinders). Using the grinder has also meant that I have had to adapt my brewing style somewhat.
But if you’re one of those crazy grinder-geeks out there, chasing the dragon of uniformity, I think this might be a good pet project.
If you already own the Wilfa Uniform, it’s also a logical next step, if you’re not entirely satisfied. It’s only $150, which is peanuts compared to all the outrageously priced “end-game” models.
The downsides
Before you go ahead, I should warn you about the downsides. There are a couple, as there will always be when you start ‘modding.’
- On occasion, the adjustment ring has changed by itself during grinding. It’s always just a couple of settings finer, but it’s enough to be annoying.
- A few times, the motor has also stopped inexplicably, just making a clicking sound, like it doesn’t have the power to go through the beans. By turning off the grinder, and adjusting it a few clicks coarser, the problem has been fixed every time.
- You lose the espresso capabilities with these new burrs.
- The grinder becomes a lot faster. Probably double the speed. However, the Wilfa Uniform was rather slow before, so this could also be seen as an improvement. However, one can’t help thinking about how the mod might affect the motor in the long term.
You should be aware of the downsides. However, I can live with the compromises. The motor stopping, or the adjustment slipping, hasn’t occurred for a while, and it seems that the grinder has adjusted to the mod.
If something happens to your grinder, don’t blame me. This is an unofficial upgrade, so there is a risk.
But do I think it’s worth it? Hell, yeah. At least if you live in Europe, where it’s easy to get a relatively affordable Wilfa Uniform.
If you’re based in the US or Asia, I wouldn’t recommend importing a grinder just to mod it. It could end up being a pretty expensive and not very fruitful endeavour.
Since its release, the Wilfa Uniform has dropped significantly in price in Scandinavia. There’s even a model available without the built-in scale that’s priced at the same level as Baratza Virtuoso.
Add $150 to that price and an hour of DIY installation and calibration, and you have a grinder that is on par with commercial models.
