These days it’s common to hear that robots and AI will rule the world in a not-so-distant dystopian future.
While there’s probably some truth to that scenario, I predict that espresso (and coffee in general) will be one of the last holdouts for human involvement.
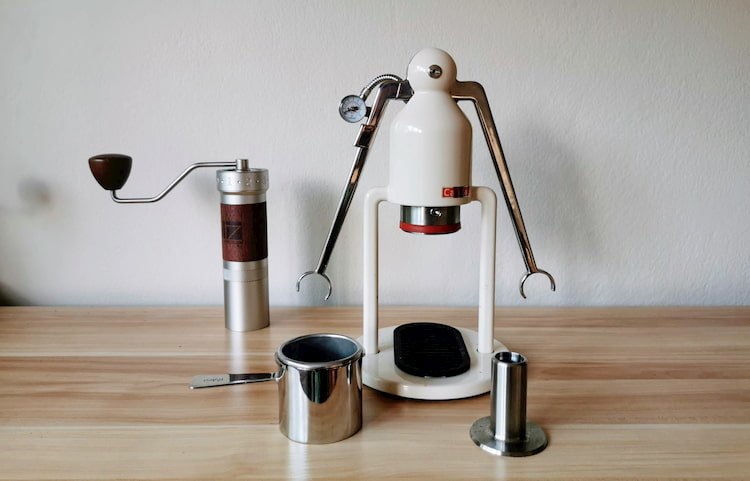
In that context, it’s kind of fun to be reviewing a manual and very low tech espresso maker called “the Robot”.
This machine does produce great shots, but it requires a significant level of user-involvement to reach the pinnacle of espresso-making.
I have had the Robot for more than three months now, so I think I have a fairly good understanding of the pros and cons.
In this review, I’ll take a close look at how it works in daily life.
I will also compare it to its more famous rival, the Flair Espresso Maker (you can skip directly to the comparison part here).
→ Check current Robot price HERE
About Cafelat
Cafelat is a coffee company based in Hong Kong. It’s founded by the espresso-machine wizard Paul Pratt, who’s famous for restoring vintage machines.
Until a few years ago, Cafelat was mostly producing espresso accessories such as knock-boxes, tamping mats, and various spare parts.
Cafelat’s products often have a playful, quirky design, which is due to the involvement of Danish artist and designer Karina Mencke.
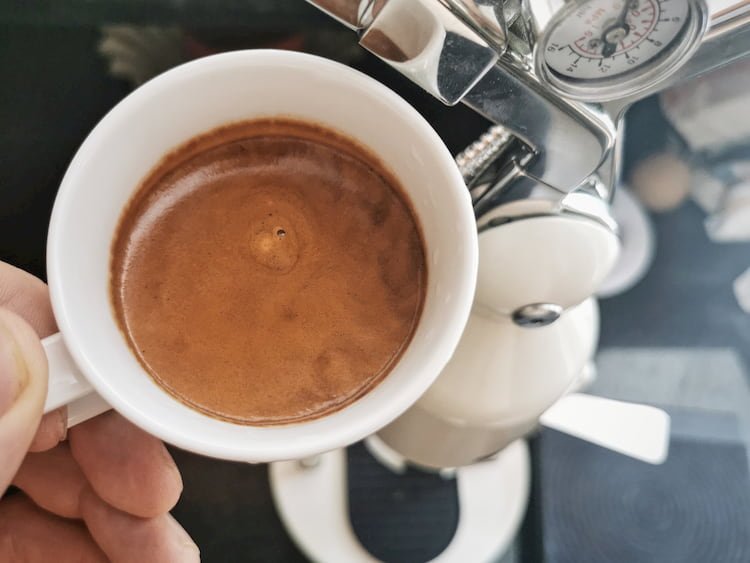
More recently, the Robot has become Cafelat’s flagship product. The development of this fully manual espresso maker began in 2015, and it was launched on Kickstarter in 2018.
The coffee maker is inspired by the Faemina Baby, which was produced and sold in Italy in the 1950s.
Design philosophy
The Cafelat Robot is a striking piece of kit in real life. You can tell that only high-quality materials have been used, and as mentioned in the previous section, it adheres to that thoughtful Danish design philosophy.
Many people adore the look of Robot, but it also has its detractors. Some people find it a bit too childish or retro-looking. In contrast, others have commented that the Robot’s anatomy and the place where the espresso comes out is rather unfortunate since it evokes some rather unpleasant imagery of bodily functions.
Personally, I wasn’t too enthusiastic about the first colorways that came out; however, the recent cream-white version looks ‘dope AF‘ as members of Generation Z would say. It doesn’t grab too much attention in my coffee corner compared to a turquoise or green model, but still looks the part.
Build quality
The Cafelat Robot is extremely sturdy. It has some heft to it. It’s made mostly of stainless steel, and no plastic is used.
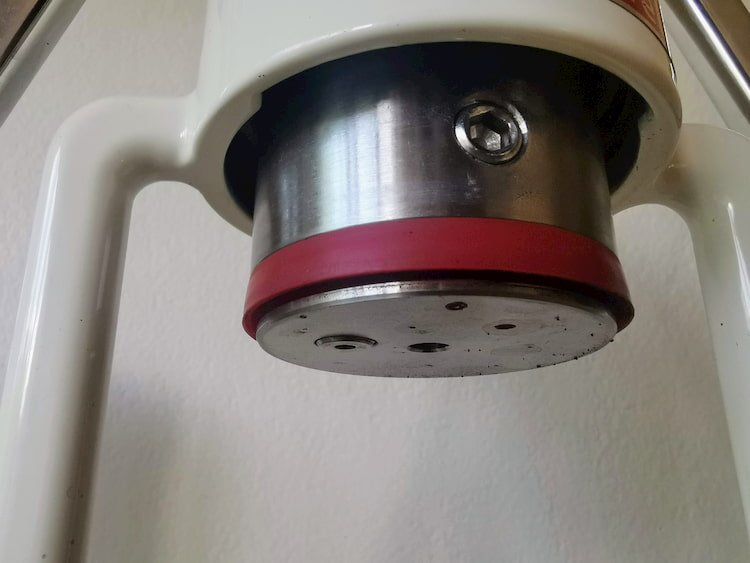
The gasket on the piston is made of food-grade silicone, which is one of the only somewhat fragile parts on the machine.
You can see a video of Paul Pratt taking the device apart, and it’s frankly fascinating to see how well-engineered and foolproof the unit seems to be.
The portafilter is again reasonably heavy and sturdy, but due to its design, it only has minimal contact with the basket where you have the coffee and the hot brew water. This is a bonus because otherwise, it could suck out a lot of thermal energy from the brewing process.
However, if you’re used to a regular portafilter, it might take a bit of time to get used to its unusual shape. The handle is short, flat, and all-metallic, while the portafilter is much deeper than a regular model.
The basket itself is extremely well-made while still being lightweight. I have never been worried about it in the time I have had the machine, even though it’s exposed to significant pressure.
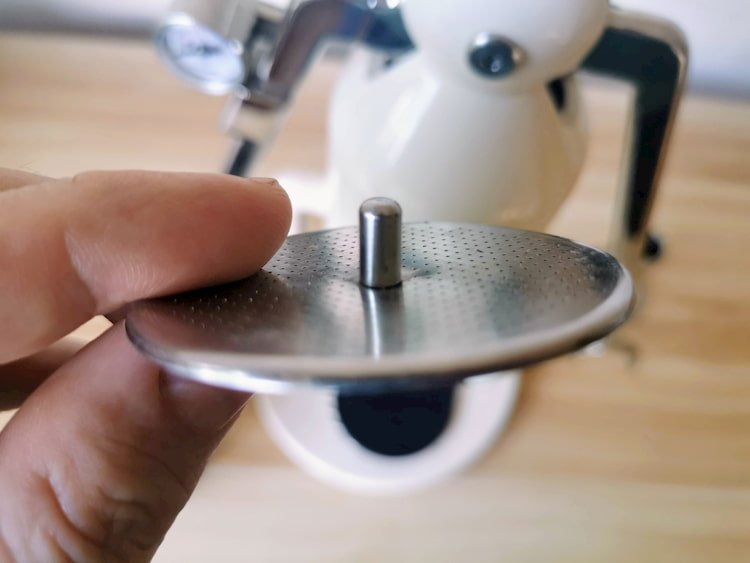
However, the achilles heel of the machine is the metal dispersion screen that goes on top of the coffee puck. It’s a very thin piece of metal that can easily get dented or bent. This can happen when you try to press out excess water of the puck. I managed to destroy one within my first month of owning the Robot, which seems to be the most common design issue for most users.
Luckily, the machine comes with a backup screen; however, I expect it to have a limited lifetime as well.
Another weak point is the silicone gasket on the piston, which can get bent out of shape if you let it sit inside the portafilter for too long. So remove it right after you’ve pulled your shot if you want to ensure longevity.
Aside from these two weak points (which can be replaced cheaply), it’s hard to see why the Robot shouldn’t last for decades. My set also came with a spare part of each.
In daily use
As with any manual espresso maker, the workflow and process are rather strange if you come from an electric espresso maker. The Robot is no exception. The weirdest thing about the Robot is that the portafilter doubles as a brew chamber.
The first few times you prepare a shot that way, it just feels weird. However, there are several advantages to this solution, and the main one is that thermal management is better than other manual espresso makers. When you pour hot water into the basket/brew chamber, it will not lose too much of its thermal energy.
Temperature-wise you’ll be in a good spot with most espresso roasts – however, when it comes to lighter roasts, you’ll still have to do some preheating to get the most out of your shot.
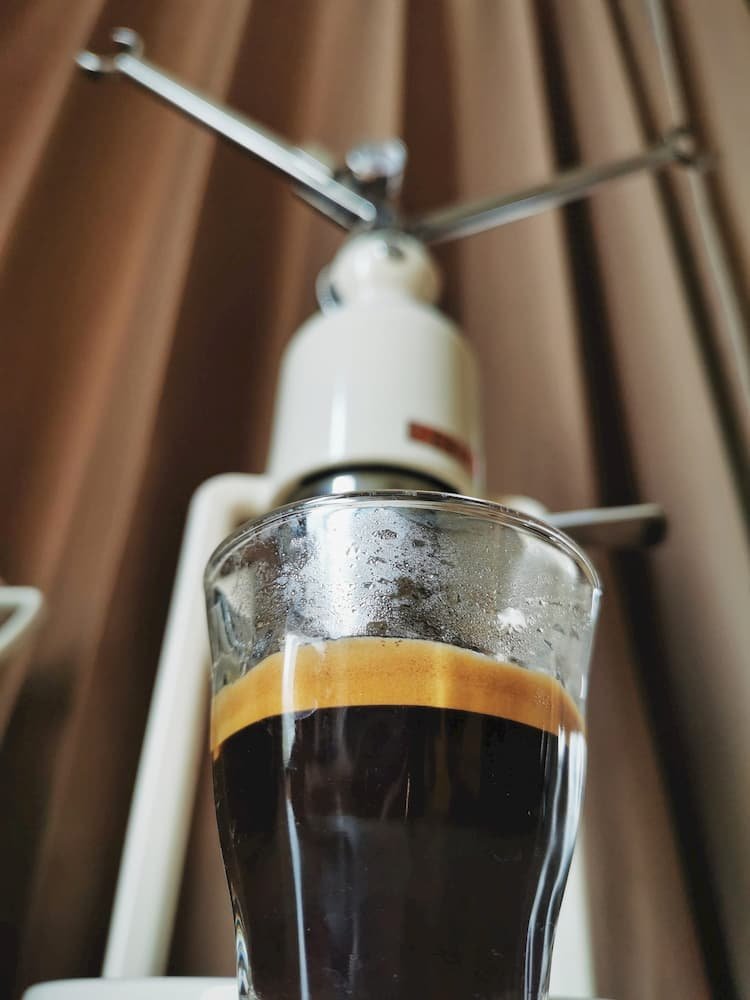
Other than that, the workflow is pretty simple. I like that the basket is so big that you can grind directly into it without any issues. If you use a dosing cup, you can also fit it on top of the basket, and shake the grounds into it for effecient and easy distribution.
Dialing in and pulling the shot does require some practice. You have all the usual challenges in making real espresso:
- Finding the right grind size
- Distribution
- Tamping
On top of that, you also have to:
- Maneuver a basket filled with almost boiling water into a pretty confined space.
- Then you have to pull to levers to exert the right amount of force on the puck, which takes some time getting used to
My unit has a pressure gauge installed, and that has been a big help when pulling shots. You can save a bit of money by skipping it, but I wouldn’t recommend it.
Pushing the two levers down is surprisingly difficult. However, as my technique has improved, and as I have settled into a lower pressure profile and a corresponding (coarser) grind size, I have found it progressively easier.
However, I have to be honest and say there have been a few occasions where it’s been close to legit exercise – especially when trying to pull lighter shots around 9 bars.
In these situations, I have been quietly cursing the anthropomorphic design of the Robot. The end of the levers is clearly designed for looking cute rather than being ergonomic.
More developed shots around 6-7 bars are another matter entirely. Unless you have some kind of hand or arm injury, most people should be able to pull a shot without facing serious difficulties.
Shot flavor
When reviewing an espresso maker, we obviously have to talk about the flavor and texture of the shots.
As stated many places, the Robot is extremely capable and on par with espresso makers three or four times the price.
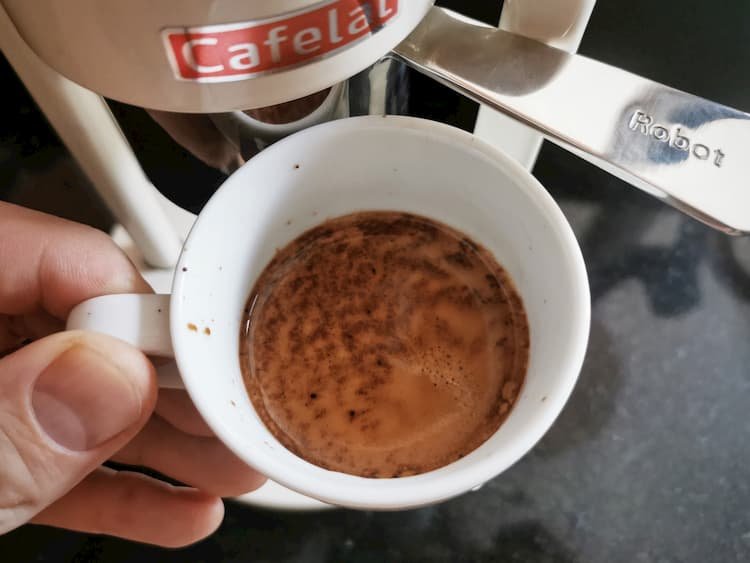
However, that statement should be moderated a little: The Robot is only as good as the operator will allow it to be.
Making good espresso is not easy. It’s a prerequisite to have a capable grinder and suitable beans.
Furthermore, you need to be able to prep the puck, and manage the intricacies of a manual lever machine.
- Lever espresso is different from a semi-automatic. And so is manual espresso making. There are a lot more variables to take into consideration. The ceiling of how far you can go is pretty high, but you simply won’t get there without a lot of involvement.
- It should be added that lever espresso machines typically work better around the 6-7 bar range rather than the standard 9 bar, which also has some impact on flavor. It will give a bit more nuance in the cup but less texture.
- Also, I’m not sure that ultralight omni roasts are the best match for this device. The few times I tried to pull those types of shots, the process was a lot more complicated; the levers will be very hard to press down (due to going finer), and you have to use some of the various preheating methods to get a higher brewing temperature.
Cleaning
Cleaning is another strong point. It’s relatively simple. Slowly press the rest of the brewing water out of the puck, unscrew the portafilter, pull out the basket and knock out the compressed puck into the trash can.
I have seen some users mention that coffee grounds can get sucked up in the area around the piston, but I haven’t experienced anything of that sort during all this time.
Of course, there will be a few squirts here and there when making espresso, but overall cleaning has been hassle-free.
Drawbacks
As you can see, I’m primarily positive when it comes to the Robot; however, there are a few downsides worth talking about for a moment.
- Fragile parts: Overall, the design from Cafelat is very sturdy, but there are a couple of vulnerable parts. The old filter screen design was especially fragile, but the new ones with the red rubber tip seem to have elimnated this problem. Also, the rubber gasket could potentially wear out if you leave the basket inside the brew head for a while. There’s a replacement for both of these parts in the box, however, and if you need additional parts, they are sold at very reasonable prices from Cafelat.
- Difficult with lighter roasts: I don’t really enjoy ultra-light espresso roasts (the kind that is ACTUALLY a filter roast), but if you do, the Robot will be a lot of work. You’d have to grind rather fine, which would make it more difficult to press the levers down. On top of that, you’d also have to factor in some kind of preheating routine.
- Price: The Robot is pretty cheap compared to other espresso machines; however, you can still find some very capable electric espresso machines in this price range, for example, the Gaggia Classic Pro.
- No Milk drinks: If you have made it this far, you should already know this, but obviously, the Robot is an espresso-only machine – there are no milk-steaming capabilities here.
Cafelat Robot vs Flair espresso maker
In the manual espresso maker space, there’s especially one other machine, besides the Robot, that’s been getting a lot of attention during the recent year, and that’s the Flair espresso maker.
➡️ Also, be sure to check my video comparison on YouTube!
I have reviewed the Flair in another post, you can see here, but to be entirely fair, you’d have to make distinctions between the basic Flair and the “Pro” version in comparison to the Robot.
- The classic Flair is significantly cheaper than the Robot – at the time of writing, it’s just one-third of its rival’s price. That puts it in a different category with entirely different expectations. If you wish to dabble a bit in espresso without committing too much, then this is the obvious entry point.
- The Flair Pro 2 is closer to the Robot in terms of price. At this price point, it gets more challenging to recommend the Flair. The espresso you can make with the Flair is close in terms of quality; however, there are some small advantages that tip the scales towards the Robot as my overall favorite.
- 58 mm basket: The Robot has a standard size basket. That means that you get a thinner puck, and as a consequence, you’re able to grind finer. This gives a more classic mouthfeel and texture to the shot that you don’t quite get with the Flair.
- Better grinder: The 58 mm portafilter can also be seen as a downside since you’ll need a more dedicated espresso grinder to really make the most of it. If you use a less than ideal grinder (for example the Baratza Encore or Lido 3), the Flair will be a better option since it’s more forgiving. Especially, the Flair Signature takes a coarser grind..
- Flavor: When it comes to shot quality, both devices are capable of producing excellent, nuanced shots. It’s hard to say that one is better than the other. However, I get well exctracted shots more frequently with the Robot. I’m not sure exactly why, but I think it has to do with the basket shape and quality, which is a notch better.
- Extraction: The extraction also seems to be consistently more even with the Robot, while the Flair tends to exhibit donut-shaped pre-infusion and is more likely to spurt.
- Preheating: The brew head of the Flair Pro has a huge thermal mass, and you have to preheat it no matter what. You don’t have to do that with the Robot unless brewing light, modern espresso roasts.
- Preparation and cleaning: There are fewer parts and steps when you want to pull a shot with the Robot. In daily life, that’s just something to appreciate. It doesn’t take that much longer to pull a shot with the Flair – on average, maybe 20-30 seconds, however, it’s just a bit more messy and complicated. Both when it comes to prepping and cleaning.
- Simplicity: In real life, a simpler design also means that fewer things can go wrong. There are more gaskets and o-rings that can get worn out, and more parts that can get lost with the Flair.
For instance, with my Flair Pro, I have had a few shots ruined by a really annoying error: when lifting the lever after pulling the shots, the pressure inside the brewing heat would get released, and because the gasket is not as tight as previously, the brew head and the portafilter would come apart and gush out water into my shot. I’m not sure if I’m the problem here, or it’s my brew head. You don’t really face these small annoyances with the Robot. (Disclaimer: I’m using the 1st iteration of the Flair Pro basket, which has a shorter collar compared to the newest version. This should help to mitigate separation as a result of pressure release after the brew).
- Form factor: Overall, I slightly prefer the feeling of using the single lever of the Flair to pull the shots. Maybe that’s just habit. On the other hand, I prefer the bigger basket and easier dosing, tamping, and setup of the Robot. So overall, I still have to give this one to the Robot.
- Travel: The Flair is a bit more suitable for bringing on the road with its carry case and foldable design. However, I assume most people who bring it along on a trip would do so in a car. I don’t see any reasons why you couldn’t have the Robot in the trunk or in the back seat. Sure, you don’t want to bring it as carry-on luggage, but the same goes for the Flair Pro. So even though the Flair wins this one, it’s not a significant victory, unless you’re looking for a dedicated travel coffee maker.
Which one should you get?:
- If you want to experiment with espresso without going ‘all-in‘ financially, the Flair is still a solid option compared to the Robot. If you’re on a budget and want to use a premium hand grinder instead of buying a dedicated espresso grinder, the Flair is probably more suitable for you.
- The Flair Pro is now placed in a slightly ‘unfortunate’ position between the Flair Signature and the Robot. Personally, I’d probably go with either the cheaper ‘Signature‘, or extend my budget all the way up to the Robot.
- If you want to make espresso a part of your daily life (and got a dedicated, electric espresso grinder) then the Robot IMHO makes more sense than the comparable Flair Pro. In daily use, the workflow, ease of cleaning and consistency makes a difference.
(2022 Update: There’s a new and bigger Flair espresso maker out, which obviously changes the situation a bit between these two rivals. Check out my Flair 58 review here.)
Conclusion
If you’re one of those people who are ready for a new hobby (which espresso is) and you want a sturdy, cool-looking, and capable option, the Cafelat Robot is currently the best option on the market.
Sure, it’s pricey for something that can’t make a latte, and at the same time, requires you to work for your shot, but when it comes to connoisseurship, that’s the name of the game.
It took me a month of experimentation to really wrap my head around this little fellow, but ever since then, the shots have been nothing short of spectacular.
Caveats:
- If your primary interest is milk-based coffee, then get a semi-automatic instead.
- If you aren’t ready to go all-in, and just want to have some fun while still drinking top-notch shots, the entry-level Flair is still a solid option.
→ Check current Robot price HERE
